Ruche Strapless Dress
When inspiration hits, you just have to answer it…
Earlier this year, I made a long sleeve ruche dress and didn’t like it. At all.
I don’t like wasting fabric or resources, so ever since I finished it, I’ve been wondering how I could salvage it. I thought maybe making it tighter would fix everything, along with making it shorter, but to be honest, I wasn’t really looking forward to wearing the style even if it did fit better.
A couple weeks ago, a photo of Lizzo popped up on my feed, with her posed in front of a private jet (assuming) in a white strapless ruched dress. When I saw it, I immediately knew I wanted to recreate it and the long sleeve ruche dress I made months ago would be the perfect bass.
Design
Lizzo’s dress is a simple strapless dress with a ruche detail down the center front, center back and the sides with a curved hem. My long sleeve ruched dress was the perfect based because all the ruching was already done. At the very least, all I had to do was cut off the top chest and sleeve parts, throw on some elastic and call it a day. Unfortunately, the fit of the original was trash so I had to figure out how I was going to fix that.
Materials
Because this was a true me made flip, I’ll give two lists. The exact items I used to alter my pre-made ruche dress and another listing the items needed if you were to create your own strapless ruche dress from scratch.
Pre-Made Ruche Dress
Long sleeve ruche dress
1” Elastic
3/8” Clear elastic
Clear Ruler
Measuring Tape
Scissors
Pins
Thread
Sewing Machine
Ruche Dress from Scratch
Jersey (2x the desired length of the finished dress)
Ruler
Measuring Tape
Scissors
1” Elastic
3/8” Clear Elastic
Sharpie
Pins
Thread
Sewing Machine
How to Make a Strapless Ruche Dress
Pattern Making
I didn’t need a pattern to flip my dress, but if you’re making it from scratch, feel free to follow these instructions.
1. Measure the Following:
Upper chest circumference (where the strapless dress will be worn at)
Waist Circumference
Hip Circumference
Length from upper chest to waist
Length from upper chest to hips
Length from upper chest to how long you want the dress in the center front
Length from under arm to how long you want the dress on the sides.
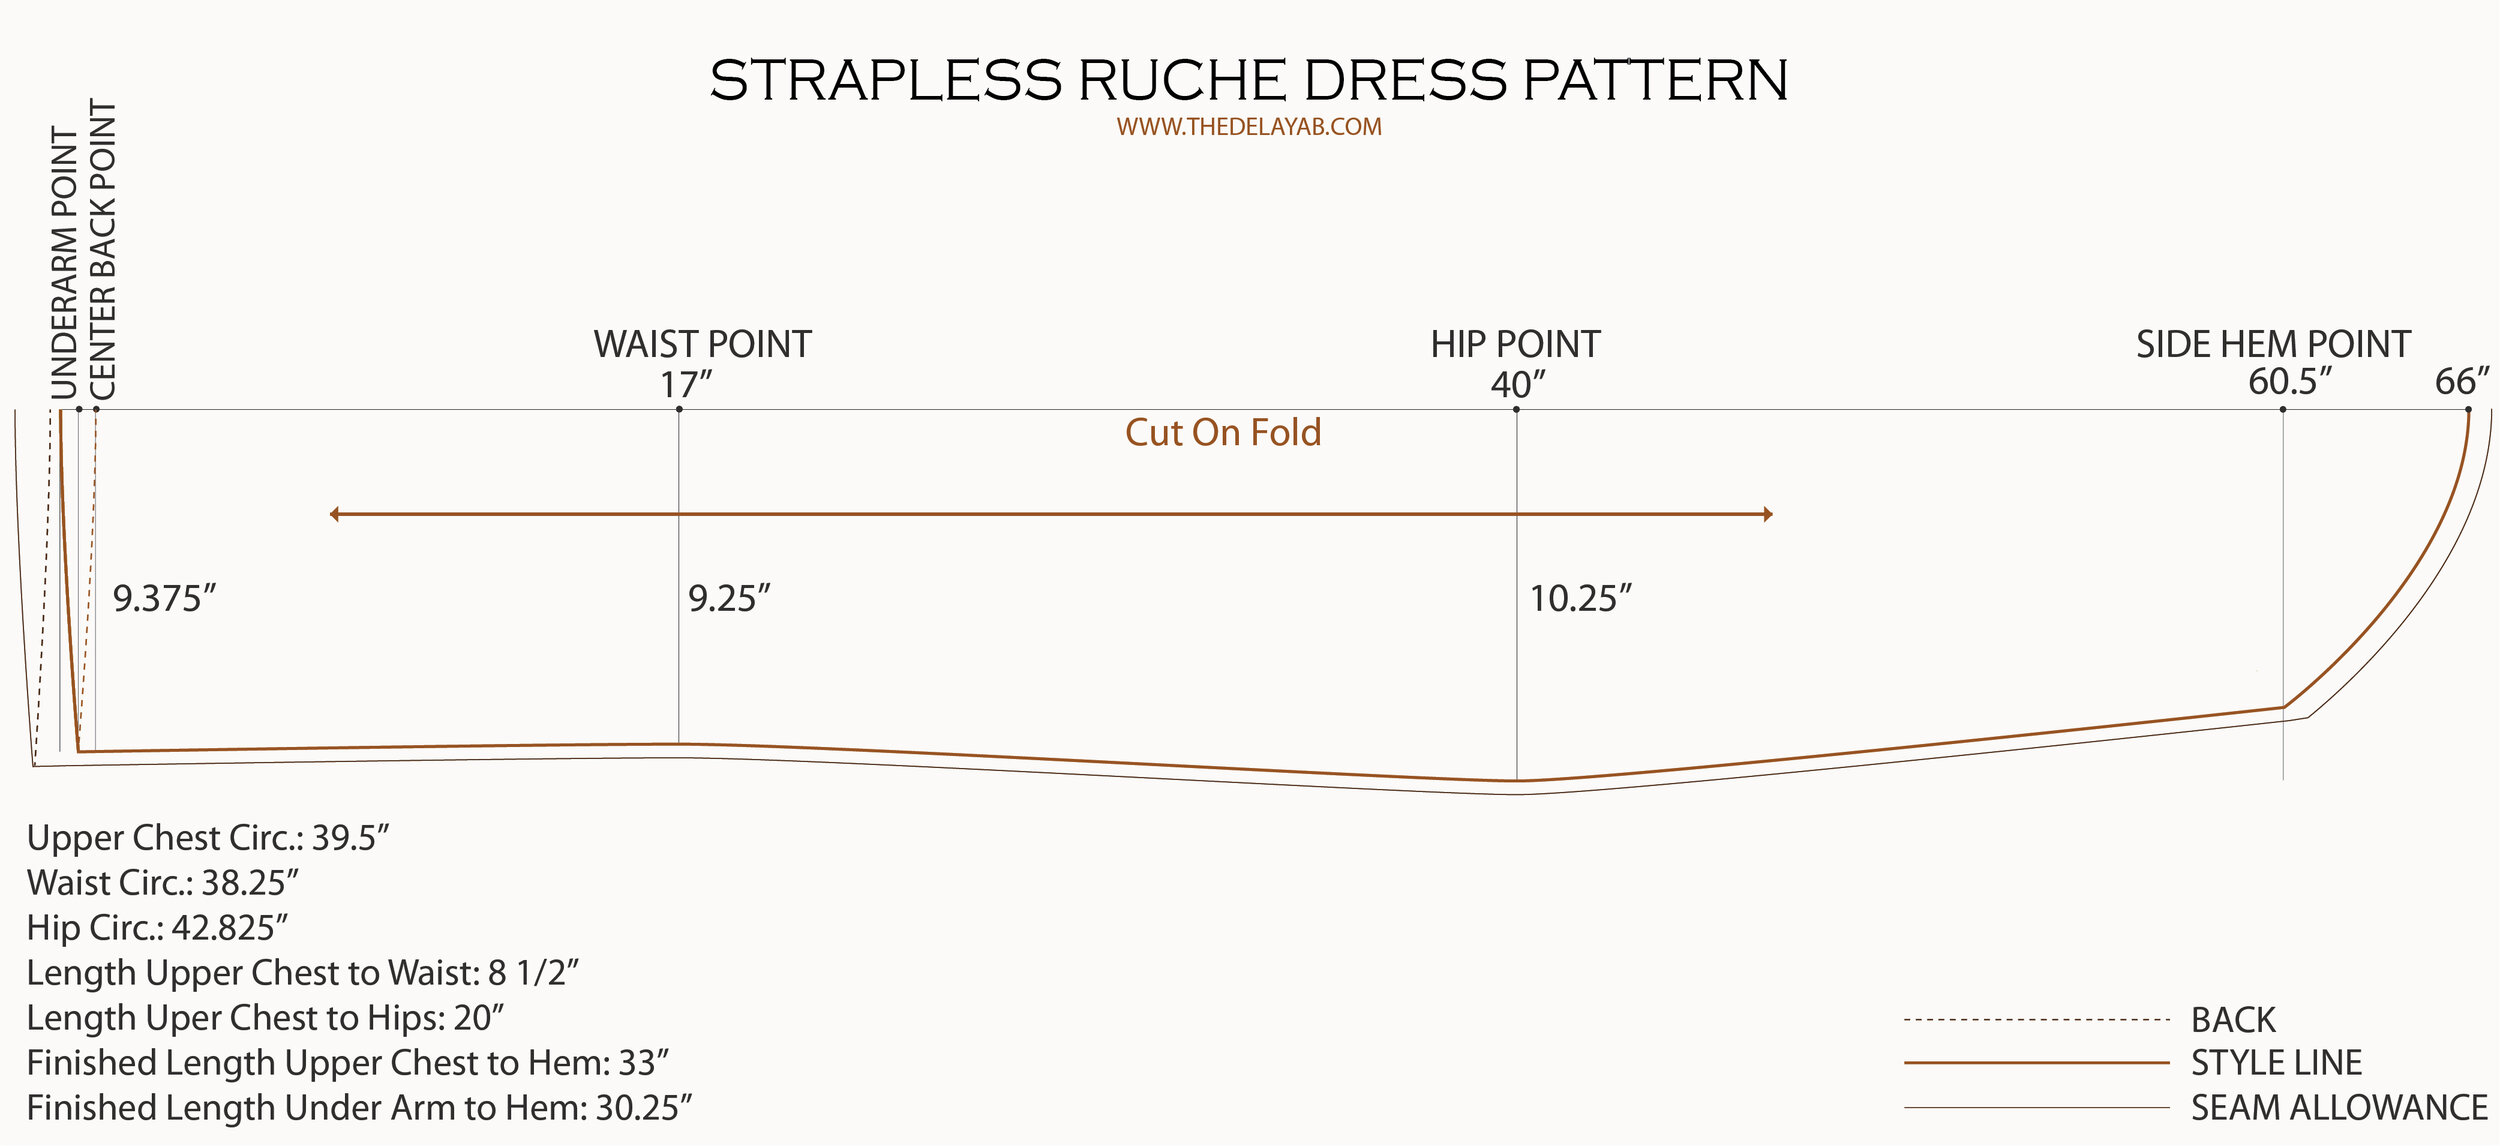
2. Make the Pattern:
Make a vertical line that’s 2x the length of the dress you want.
Make a horizontal line at the top that’s 1/4 of the length minus 1/2” of your upper chest circumference.
Make two parallel lines, one 1/2” and one 1” below that one the same length. Draw a vertical line that’s parallel to the center line, that’s 2x the length you want on the side of the dress.
On the vertical line, mark a point that’s 2x the length from upper chest to waist. Square a line that’s 1/4 of your waist circumference measurement minus 1/4”. This is your waist line.
On the vertical line, mark a point that’s 2x the length from your upper chest to hips. Square a line that’s 1/4 of your hip circumference measurement minus 1/2”. This is your hip line.
Shape the rest of your pattern by following the [COLOR] lines in the example below. One is the front, the other is the back.
Add seam allowance. Add 3/8” seam allowance to the sides. Add 1 1/4” to the top. Add 5/8" to the bottom.
Cutting
On my pre-existing dress, I folded it in half to make sure everything stayed symmetrical. I cut it straight across the chest. On the back, strapless dresses fall lower than the front, so I cut an additional 1” from the back.
Because the fit was trash on my bust, I decided to cut the entire ruche off the sides and redo it. I cut off 2” from both sides for a tighter fit but that ended up being a mistake. I probably should’ve only cut off 1” to 1 1/2” from the sides but once you cut, dat’s it.
From scratch
Cut the dress shape out on the fold. On the wrong side of the fabric, make marks along the center lines of the front and back so you know where to put the clear elastic. Make the marks at 1/4, 1/2 and 3/4 of the length of the front and back. Make the same 1/4, 1/2 and 3/4 marks on the side seams of the dress pieces.
For the clear elastic, you’ll need 4 pieces. Cut two that match the length from upper chest to how long you want the dress in the center front; these elastics are for your front and back ruching. Cut two that match the length from under arm to how long you want the dress on the sides; these elastics are for your side seam ruching.
Whether pre made or from scratch, you’ll need the 1” elastic. Cut it the same length as your upper chest circumference. You’ll use 1” for seam allowance.
Sewing
Sewing for my ruche dress alteration was simple. All I had to do was ruche the side seams and do the tunnel for the elastic at the top of the strapless dress.
How to Ruche
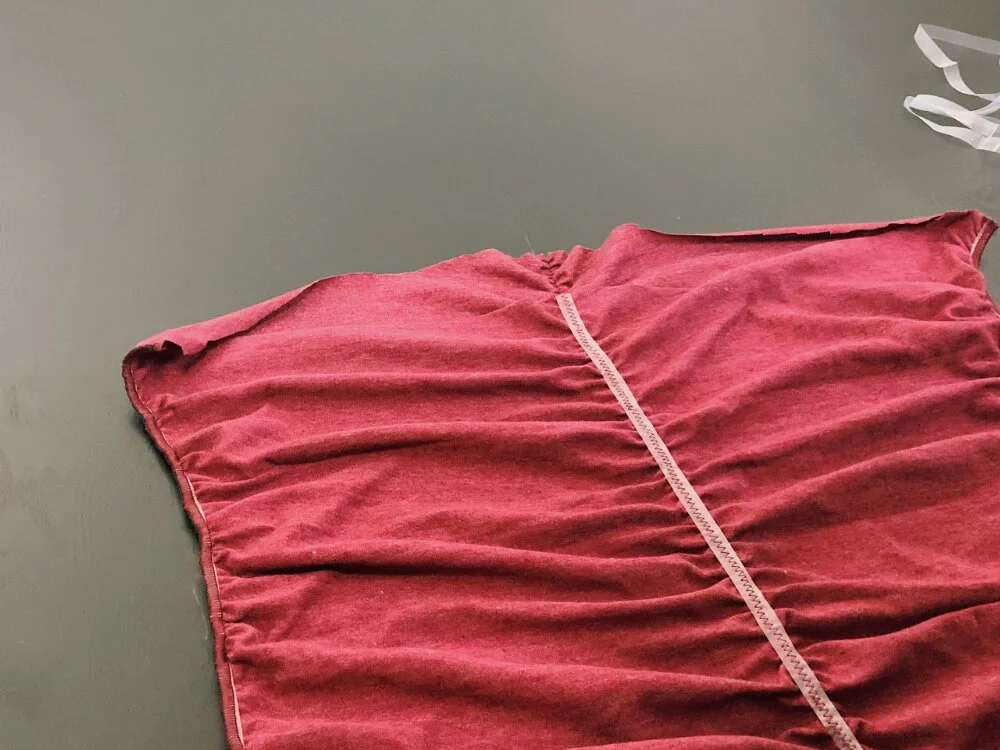
To ruche, make sure the 1/4, 1/2 and 3/4 spots are marked on the pieces down the front, down the back and sides. Take the clear elastic and sharpie. Mark the 1/4, 1/2 and 3/4 points on the elastic. Pin these points to the corresponding points on the wrong side of the dress pieces. Do the front by itself, then the back by itself.
When these points are pinned, you’re going to stretch each section to the point where the clear elastic matches the length of that quarter section. While stretched, press down in the middle of that section, relax the elastic and pin it down in place. Do that in every quarter section. Continue to do it in each smaller section until you feel the elastic is secure enough and you feel you can comfortably sew it without the elastic getting off center.
Take your pinned front and back piece(s) to the sewing machine. Wrong side up, so you can see the clear elastic and all the pins, start with a straight stitch to lock everything in place. Do two to three stitches forward and back. Switch to a zig zag stitch that’s wide but narrow enough to stay on the clear elastic. As you sew, stretch the elastic so it’s the same length as that pinned section. You MUST stretch the elastic as you sew or else the ruching will not work.
[SEWING & PULLING ELASTIC]
If you need the visuals of how to ruche, watch the video starting from 3:43.
Ruche the front, the back, and the side seams.
Finishing
For the top of the dress, fold the top over 1 1/4”. Sew a 1” tunnel with a zig zag stitch, leaving 2” open. Feed the elastic through that opening, using a safety pin or this nifty tool I found at Mood Fabrics. Making sure the elastic hasn’t twisted in the tunnel, sew the ends of the elastic together by layering the ends 1/2”. Zig Zag repetitively over each end of the elastic to make sure it’s secure. For clarity, watch the video starting from 5:23. Stretch the elastic in place and close the tunnel opening.
For my dress, I cheated and made sure I didn’t have to redo a hem. I cleanly sewed the side seams and made sure neither side was longer than the other at the hem.
For the ruche dress made from scratch, fold the hem under 5/8” and sew the hem down. You can choose a zig zag or straight stitch since it’s not a high stress area. You’ll still need to slightly pull the jersey fabric as you stitch to make sure you don’t end up gathers.
Critique
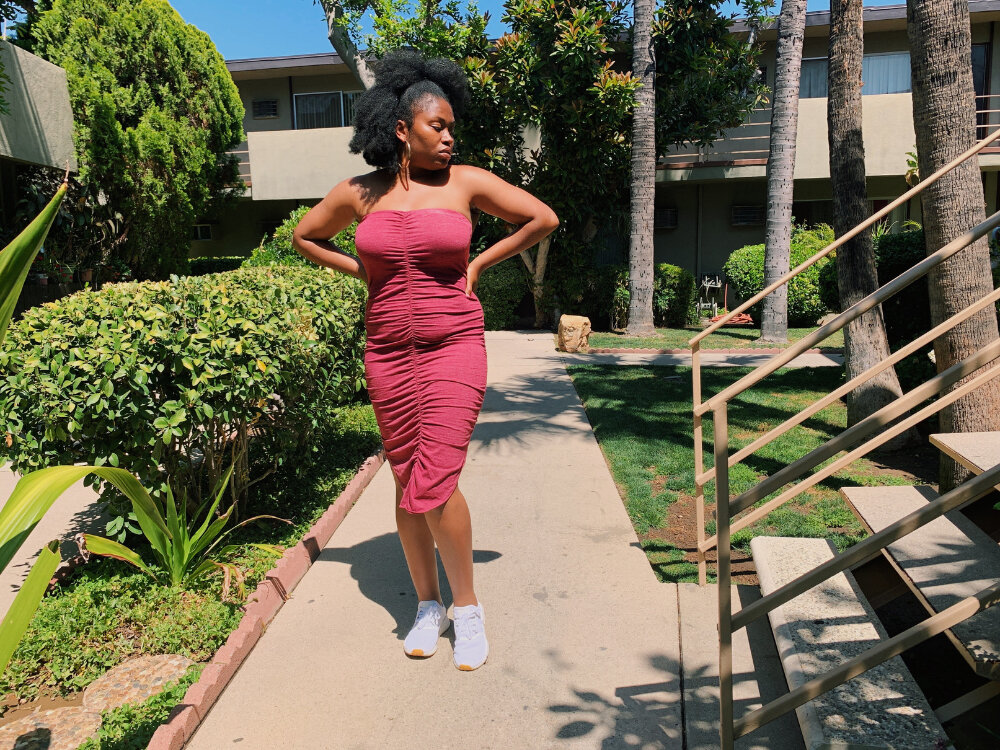
So, like I said earlier, I took way too much off the sides and because of that, it doesn’t fit. I can wear it but breathing is a little constricted. The mission at hand was accomplished though. I did flip this me made long sleeve ruche dress into a strapless ruche dress that matched Lizzo’s ruche dress from her birthday. That makes this a win.
Not sure what I’ll do with the dress now. At this point, I’ll either hand it off to my younger cousin or start shop on the site for me makes that don’t work out quite right.
Evaluation
This was a very easy flip. I did this project in a couple hours and that’s only because I was filming and had to run to Joann to get more clear elastic. I did like reviving what was initially a failed project.


