
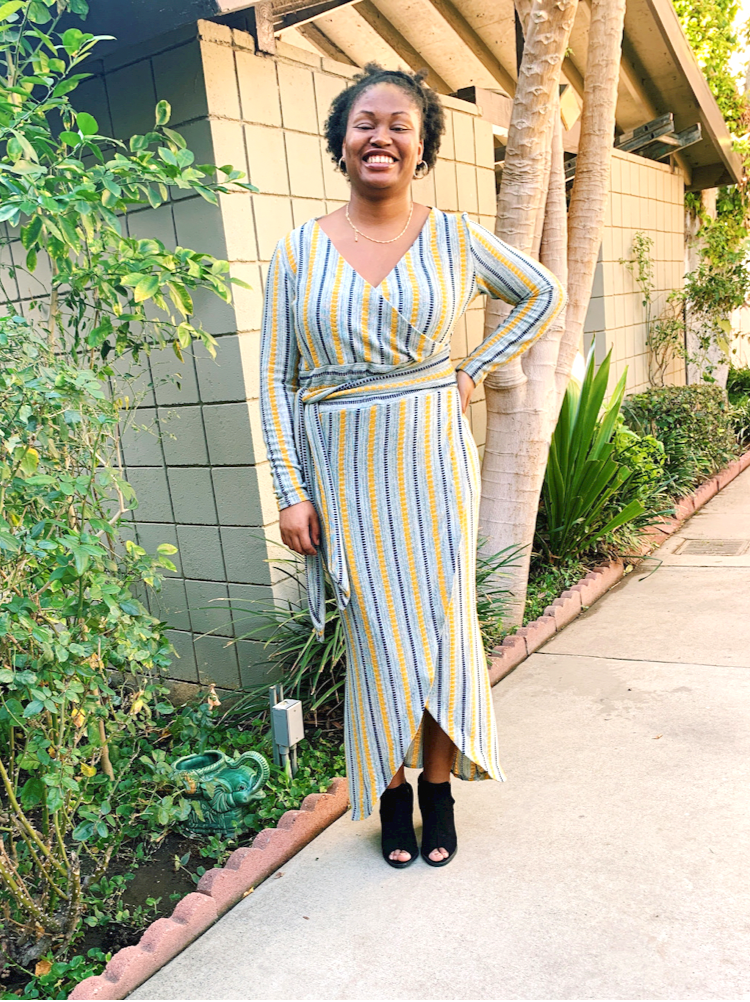
Faux Wrap Sweater Knit Striped Dress
I’ve finally started to work my way through my personal fabric stash. I’ve made turtlenecks, a ruched dress and now a sweater knit wrap dress. I’ve had this blue and yellow striped sweater knit in my stash for years and I’m finally giving it purpose.

Design
What drew me to this fabric was the stripe of the fabric. The hue of the blue and yellow. They were bold but not loud or obnoxious. They had a sophistication to them. When coming up with the design, I wanted to make sure to highlight the stripes in some way or another.
At first, I thought I was going to do an Alexander McQueen type design, playing with a romantic goth aesthetic. There would have been a frilled turtleneck and princess panels with the stripe going in different angles. I would have loved that but time was against me. Time and the depth of energy I was willing to put in, if we’re being truly honest.
So, I simplified the design down to a wrap dress and I was still able to do a little somethin’ somethin’ with the stripe pattern.
Materials
Sweater Knit - Personal Stash
Interfacing
Thread
Tools
Ballpoint needle
iron
Ironing board
scissors
stick pins
overlock machine
sewing machine
Pattern Making
Patterning this was definitely a lot easier than the ruche dress. So much easier.
I started with my basic knit foundation pattern and modified it from there. Since the fabric is knit, there is little I had to worry about in contouring the fit to my body so that was a plus.
For the wrap style feature, I first marked my boob on the pattern, represented by the circle, using my bust radius measurement. From there, I drew an empire waistline and a line going across the chest from one shoulder to the opposite waist.
I wanted the skirt to flare out a little, so I added that to the skirt shape and curved the front hemline of the skirt.
Cutting
Glory be to God that I had just enough fabric to make this style. I didn’t bother counting the yardage before I started so thank goodness I didn’t have to scrap the whole thing while in the middle of cutting it out. Unfortunately though, I was supposed to cut out three waistband pieces - one for the back and two for the front because it’s a wrap dress - but I only cut 2 out. Even with a checklist of all the pieces I needed, I still messed that up!
If you’re wondering why I didn’t just go back and cut another waIstband, well, because I prematurely threw the scraps of fabric away right after I finished cutting. The scraps were resting in the bottom of the kitchen trash can so I made the executive decision to not go in after it.

Sewing
I didn’t notice I was missing a waistband piece until I was knee deep in sewing. By the time I noticed, I had already sewn the back pieces together and was getting ready to put the front left and right pieces together. Once I realized I was short a piece, a very important one for a wrap style, I had to change up my sewing plans on the fly. Something that isn’t difficult, just inconvenient.
Critique
Despite the dress ending up as a faux wrap dress, I really like how it came out. I would change a few fit details, like decrease the height of the bodice for a better under cleavage fit and decrease the height of the waistband so it doesn’t highlight my stomach area. Also, if it were staying a faux wrap pattern, I’d put the belt tie on the opposite side of the waist for a more accurate “tie” look.
Evaluation
She was all overlock so she was very easy to sew. I’d say the focus would be for a better fit next go around. That, and getting the facing not to warp on the curves.